1.7. 使用LCD显示器画几何图形
本节种我们将继续探索LCD屏幕显示的功能,掌握如何在IoTs2的彩色LCD屏幕上绘制基本几何图形,包括直线、三角形、任意多边形、 矩形、圆角矩形和圆,并掌握边框线径、填充与透明等处理。利用这些绘制基本几何图形的方法,我们能够创意出各种各样的几何图案。
绘制几何图案并形成“糖葫芦”动画效果
相信你现在能明白本节最后面所列举的基本几何图形接口及其说明,下面的第一个示例程序是非常有趣的动画效果——“吃糖葫芦”。 我们知道糖葫芦是由几颗涂满红色糖浆的水果和一根串水果的木棒组成,即包含2种几个图案:填充圆和直线。 接着上一节的多种显示内容以“group”形式来组织的思维,下面的第一个示例种仅增加绘制基本几何图形的程序。 示例程序如下:
1 2 3 4 5 6 7 8 9 10 11 12 13 14 15 16 17 18 19 20 21 22 23 24 25 26 27 28 29 30 31 32 33 34 35 36 37 38 39 40 41 42 43 44 45 46 47 48 49 50 51 52 53 54 55 56 | import time
import displayio
import terminalio
from adafruit_display_shapes.line import Line
from adafruit_display_shapes.triangle import Triangle
from adafruit_display_shapes.polygon import Polygon
from adafruit_display_shapes.rect import Rect
from adafruit_display_shapes.roundrect import RoundRect
from adafruit_display_shapes.circle import Circle
from adafruit_display_text.label import Label
from hiibot_iots2 import IoTs2
iots2 = IoTs2()
iots2.screen.rotation = 180
shape_group = displayio.Group() # 3 sub-groups
# Color variables available
y_initial = 25
RED, GREEN, GOLD = (255, 0, 0), (0, 255, 0), (255, 222, 30)
lines, circles = [], []
# draw 3 lines and append on the lines_subgroup
lines_subgroup = displayio.Group()
for i in range(3):
lines.append( Line(66+i, 8, 66+i, 230, color=GOLD) )
lines_subgroup.append(lines[i])
shape_group.append(lines_subgroup)
# draw 6 circles and append on the circle_subgroup
circle_subgroup = displayio.Group()
for i in range( 6 ):
circles.append( Circle(67,y_initial+(i*20), 16, fill=RED, outline=RED) )
circle_subgroup.append(circles[i])
shape_group.append(circle_subgroup)
# create a text label
textlabel_subgroup = displayio.Group(scale=2)
textlabel = Label(terminalio.FONT,x=18,y=78,text="",max_glyphs=24, color=GREEN)
textlabel_subgroup.append(textlabel)
shape_group.append(textlabel_subgroup)
# show those content on the IoTs2 screen
iots2.screen.show(shape_group)
while True:
textlabel.text = 'eat it'
time.sleep(0.5)
textlabel.text = 'eating'
for i in range(len(circles)):
jy = circles[i].y//3
for j in range(jy+3):
circles[i].y -= 3
time.sleep(0.02)
circles[i].hidden = True
time.sleep(0.2)
lines_subgroup.hidden = True
textlabel.text = 'again'
time.sleep(0.5)
for i in range(len(circles)):
circles[i].y = y_initial+(i*20)
lines_subgroup.hidden = False
for i in range(len(circles)):
circles[i].hidden = False
|
将上面的代码保存到IoTs2的CIRCUITPY/code.py文件中,IoTs2的屏幕上将会呈现一种动画的效果:一串糖葫芦逐个被吃掉, 然后又出现一串新的糖葫芦,再被逐个吃掉,如此重复。在这个示例中,我们将用到adafruit_display_shapes模块, 运行示例程序前,请确认这个库模块已经保存在CIRCUITPY/lib/文件夹中,参见IoTs2的库及其下载向导,自行下载和复制文件到该文件夹中。
示例代码分析:
第1行,导入一个Python内建的模块“time”
第2行,导入一个Python内建的模块“displayio”
第3行,导入一个Python内建的模块“terminalio”
第4行,从“/CIRCUITPY/lib/adafruit_display_shapes/line.py”模块中导入Line类
第5行,从“/CIRCUITPY/lib/adafruit_display_shapes/triangle.py”模块中导入Triangle类
第6行,从“/CIRCUITPY/lib/adafruit_display_shapes/polygon.py”模块中导入Polygon类
第7行,从“/CIRCUITPY/lib/adafruit_display_shapes/rect.py”模块中导入Rect类
第8行,从“/CIRCUITPY/lib/adafruit_display_shapes/roundrect.py”模块中导入RoundRect类
第9行,从“/CIRCUITPY/lib/adafruit_display_shapes/circle.py”模块中导入Circle类
第10行,从“/CIRCUITPY/lib/adafruit_display_text/label.py”模块中导入Label类
第11行,从“/CIRCUITPY/lib/hhiibot_iots2.py”模块中导入IoTs2类
第12行,将导入的“IoTs2”类实例化为一个实体对象,名叫“iots2”,本示例将使用“iots2.screen”来访问彩色LCD屏幕
第13行,将IoTs2的屏幕方向调整为竖屏且USB插座在屏幕上方,即屏幕旋转180度
第14行,声明一个displayio类显示元素群Group型变量,名叫“shape_group”
第15行,注释
第16~18行,定义数值变量y_initial,元组变量RED、GREEN和GOLD,以及列表lines和circles
第19行,注释
第20行,定义一个名叫lines_subgroup的displayio类Group子类的实体对象
第21~23行,使用一个3次的循环绘制3个直线,并将每个直线都添加到lines_subgroup中
第24行,将lines_subgroup添加到shape_group中
第25~30行,定义displayio类Group子类的实体对象circle_subgroup,并添加6个红色填充圆(6个糖葫芦的果子),最后把circle_subgroup添加到shape_group中
第31~35行,定义displayio类Group子类的实体对象textlabel_subgroup,并添加一个文本标签textlabel到该组,然后把该组添加到shape_group中
第36行,注释。注意, 至此我们已经将“糖葫芦”的几何元素绘制完毕,并逐个添加在shape_group中
第37行,将shape_group作为iots2的screen的显示对象传递给“iots2.screen.show()”函数
第38行,定义一个无穷循环程序块
第39行(无穷循环程序块的第1行),指定textlabel的text属性值为“eat it”
第40行(无穷循环程序块的第2行),程序暂停0.5秒
第41行(无穷循环程序块的第3行),指定textlabel的text属性值为“eating”
第42~48行(无穷循环程序块的第4~10行),用一个嵌套循环让一个“糖葫芦的果子”缓慢地移到屏幕顶端并隐藏。外循环是6次,即6个果子每个果子一次;内循环次数是可变的,由每个果子的y坐标确定
第49行(无穷循环程序块的第11行),隐藏lines_subgroup
第50行(无穷循环程序块的第12行),指定textlabel的text属性值为“again”
第51行(无穷循环程序块的第13行),程序暂停0.5秒
第52~53行(无穷循环程序块的第14~15行),用一个循环将糖葫芦的6个果子分别移到原始位置
第54行(无穷循环程序块的第16行),显示lines_subgroup
第55~56行(无穷循环程序块的第17~18行),用一个循环将糖葫芦的6个果子分别显示出来
虽然示例程序看起来有50+行,但关键的程序功能是绘制直线当作串起“糖葫芦”的木棒,绘制红色填充圆当作“糖葫芦”的果子, 并在无穷循环中控制每个果子移动-隐藏,然后再将果子移到初始位置并显示出来,重复这两步就可以形成动画效果。
用按钮交互实现“吃糖葫芦”游戏
游戏和动画相比较,游戏增加了交互设计,增加游戏输入和游戏的规则,即可将动画变成游戏。下面的示例是将前一个“糖葫芦”动画效果的示例代码修改为“吃糖葫芦”游戏, 游戏的输入仅有一个按钮,即IoTs2的板载按钮(IO21)或IoTs2v2的板载按钮(IO0)。游戏规则也十分地简单:当按下按钮一次即吃掉一个果子,6个果子全部吃掉后显示吃果子的总耗时。 示例代码如下:
1 2 3 4 5 6 7 8 9 10 11 12 13 14 15 16 17 18 19 20 21 22 23 24 25 26 27 28 29 30 31 32 33 34 35 36 37 38 39 40 41 42 43 44 45 46 47 48 49 50 51 52 53 54 55 56 57 58 59 60 61 62 63 64 65 66 | import time
import terminalio
import displayio
from adafruit_display_shapes.line import Line
from adafruit_display_shapes.triangle import Triangle
from adafruit_display_shapes.polygon import Polygon
from adafruit_display_shapes.rect import Rect
from adafruit_display_shapes.roundrect import RoundRect
from adafruit_display_shapes.circle import Circle
from adafruit_display_text.label import Label
from hiibot_iots2 import IoTs2
iots2 = IoTs2()
iots2.screen.rotation = 180
shape_group = displayio.Group() # 3 sub-groups
# Color variables available for import.
RED, GREEN, GOLD = (255, 0, 0), (0, 255, 0), (255, 222, 30)
lines, circles = [], []
# draw 3 lines and append on the lines_subgroup
lines_subgroup = displayio.Group()
for i in range(3):
lines.append( Line(66+i, 8, 66+i, 230, color=GOLD) )
lines_subgroup.append(lines[i])
shape_group.append(lines_subgroup)
# draw 6 circles and append on the circle_subgroup
y_initial = 25
circle_subgroup = displayio.Group()
for i in range( 6 ):
circles.append( Circle(67,y_initial+(i*20), 16, fill=RED, outline=RED) )
circle_subgroup.append(circles[i])
shape_group.append(circle_subgroup)
# create a text label
textlabel_subgroup = displayio.Group(scale=2)
textlabel = Label(terminalio.FONT,x=18,y=88,text="",max_glyphs=24, color=GREEN)
textlabel_subgroup.append(textlabel)
shape_group.append(textlabel_subgroup)
# show those content on the IoTs2 screen
iots2.screen.show(shape_group)
eat_index = 0
textlabel.text = 'eating'
s_point = time.monotonic()
while True:
if iots2.button_state:
jy = circles[eat_index].y//3
for j in range(jy+3):
circles[eat_index].y -= 3
time.sleep(0.02)
circles[eat_index].hidden = True
eat_index += 1
if eat_index>=len(circles):
tl = time.monotonic() - s_point
eat_index = 0
for i in range(20):
lines_subgroup.y += 5
time.sleep(0.01)
lines_subgroup.hidden = True
lines_subgroup.y = 0
textlabel.text = '{:.3f}'.format(tl)
time.sleep(0.5)
for i in range(len(circles)):
circles[i].y = y_initial+(i*20)
lines_subgroup.hidden = False
for i in range(len(circles)):
circles[i].hidden = False
time.sleep(0.5)
textlabel.text = 'eating'
s_point = time.monotonic()
|
程序的具体细节不必赘述,绝大多数与前一个示例的代码相同,在无穷循环中仅增加一个条件判断——IoTs2的按钮是否被按下,如果未被按下则什么都不做; 如果按钮被按下,模拟吃掉“糖葫芦”的一个果子;没吃掉一个果子还要判断果子是否已全部吃掉,如果是则显示总耗时并再显示一个完整的“糖葫芦”。
本示例程序在IoTs2上的执行结果如下图:
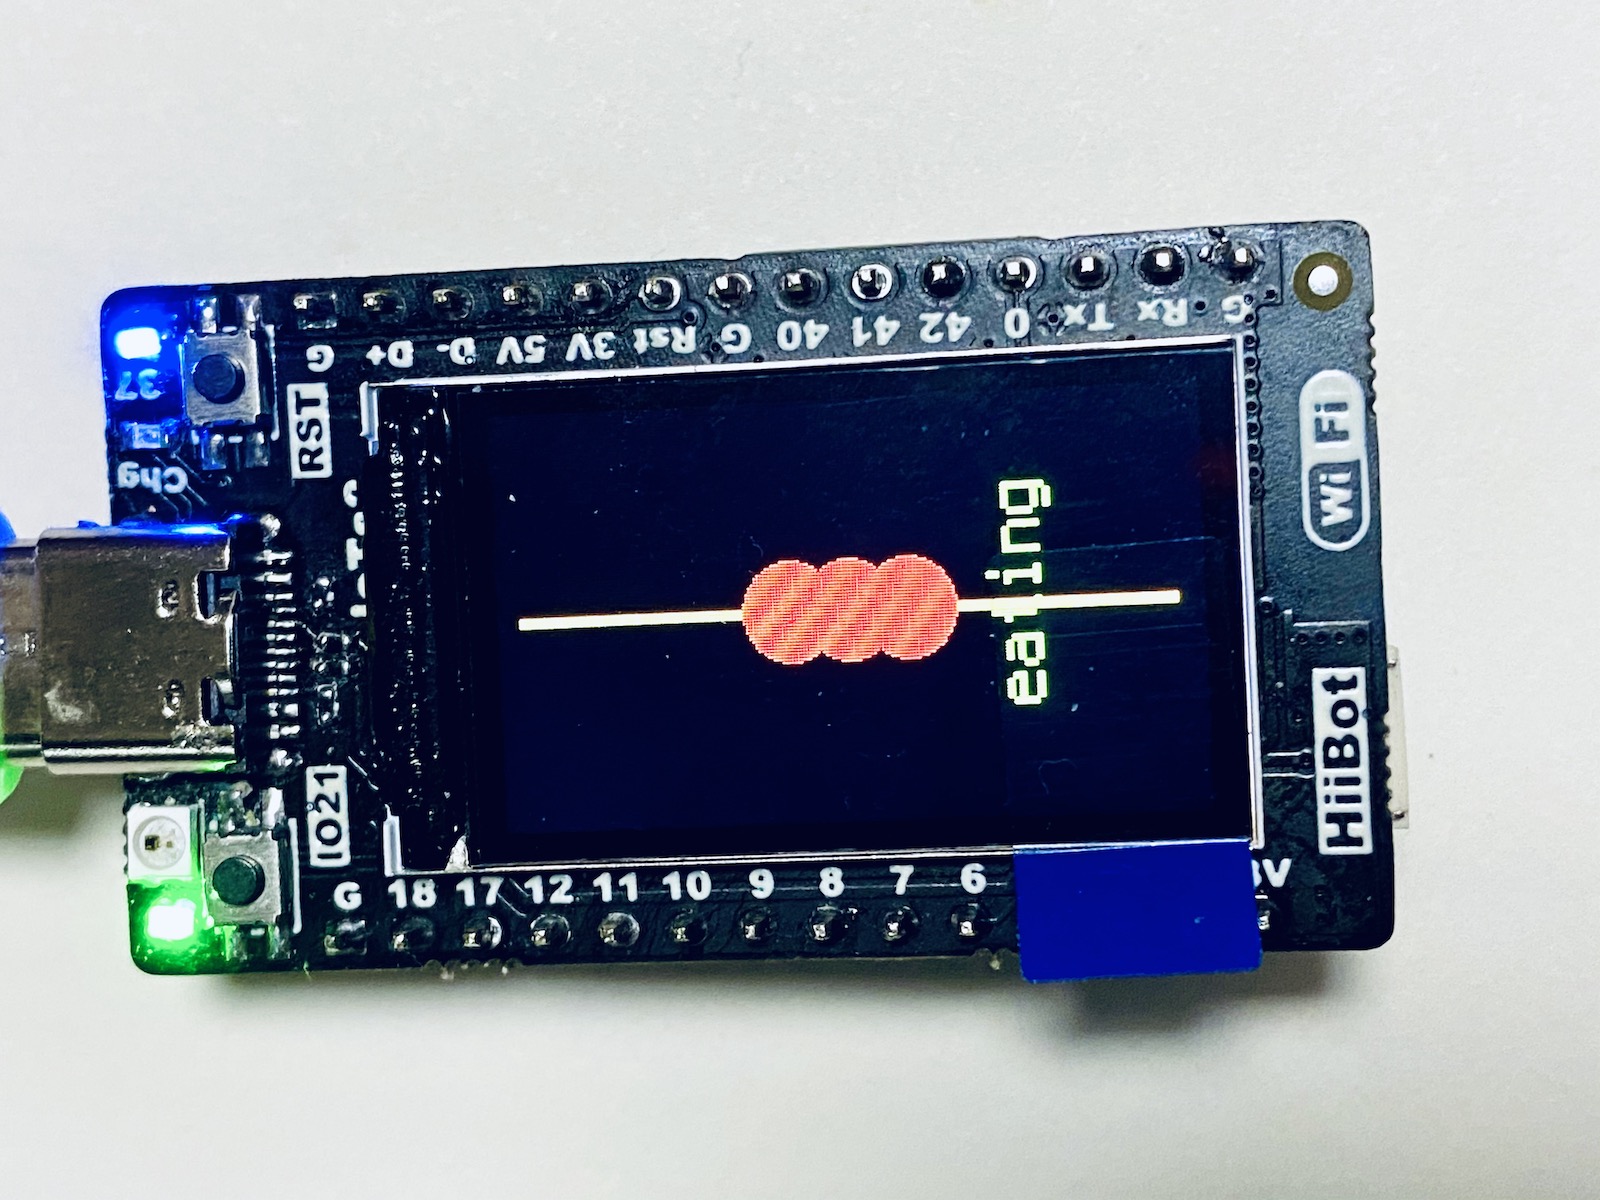
如果你把本示例代码保存到IoTs2的/CIRCUITPY/code.py文件中,当你看到IoTs2执行该程序的效果时,请你立即按下IoTs2的按钮(IO21)或IoTs2v2的按钮(IO0), 将会看到一个果子移出“糖葫芦”的木棒(模拟被吃掉的效果),再按下按钮后另外一个果子也会被“吃掉”,继续重复,然后看自己总耗时是多久, 跟其他人比一比看谁吃得快。这是一中非常有趣的小游戏。
使用本节所get的技能,你一定能设计出更有趣的图案、动画或游戏。
总结:
基本几何形状及其参数
填充与透明
颜色的十六进制表示
绝对坐标
本节中,你总计完成了108行代码的编写工作
Important
adafruit_display_shapes接口
Line (子类), line = Line(x0, y0, x1, y1, color)
x0, y0: 起点坐标
x1, y1: 终点坐标
color: 线颜色,一个十六进制的颜色值,如0xFF0000
Triangle (子类), triangle = Triangle(x0, y0, x1, y1, x2, y2, fill=None, outline=None)
x0, y0, x1, y1, x2, y2: 顶点坐标
fill: 填充颜色选项,=None:透明/无填充;=0xFF0000:填充为红色,或其他颜色的十六进制数
outline: 外框线颜色,=None:使用默认的前景色;=0xFF0000:外框线为红色,或其他颜色的十六进制数
Polygon (子类), polygon = Polygon(listPoints, outline=None)
listPoints: 顶点坐标的列表,如[(x0, y0), (x1,y1), .., (xm, ym)]
outline: 线颜色,=None:使用默认前景色;=0xFF0000:外框线为红色,或其他颜色的十六进制数
Rect (子类), rect = Rect(x, y, width, height, fill=None, outline=None, stroke=1)
x, y, width, height: 左上顶点坐标、宽度和高度
fill: 填充颜色选项,=None:透明/无填充;=0xFF0000:填充为红色,或其他颜色的十六进制数
outline: 外框线颜色,=None:使用默认的前景色;=0xFF0000:外框线为红色,或其他颜色的十六进制数
stroke: 线径(粗细),默认为1,可设定其他值
RoundRect (子类), rrect = RoundRect(x, y, width, height, r, fill=None, outline=None, stroke=1)
x, y, width, height: 左上顶点坐标、宽度和高度
r: 圆角半径,最小值为0,最大值=min(width//2, height//2)
fill: 填充颜色选项,=None:透明/无填充;=0xFF0000:填充为红色,或其他颜色的十六进制数
outline: 外框线颜色,=None:使用默认的前景色;=0xFF0000:外框线为红色,或其他颜色的十六进制数
stroke: 线径(粗细),默认为1,可设定其他值
Circle (子类), circle = Circle(cx, cy, r, fill=None, outline=0xFF0000)
cy, cy,r: 圆心坐标和半径
fill: 填充颜色选项,=None:透明/无填充;=0xFF0000:填充为红色,或其他颜色的十六进制数
outline: 外框线颜色,=None:使用默认的前景色;=0xFF0000:外框线为红色,或其他颜色的十六进制数